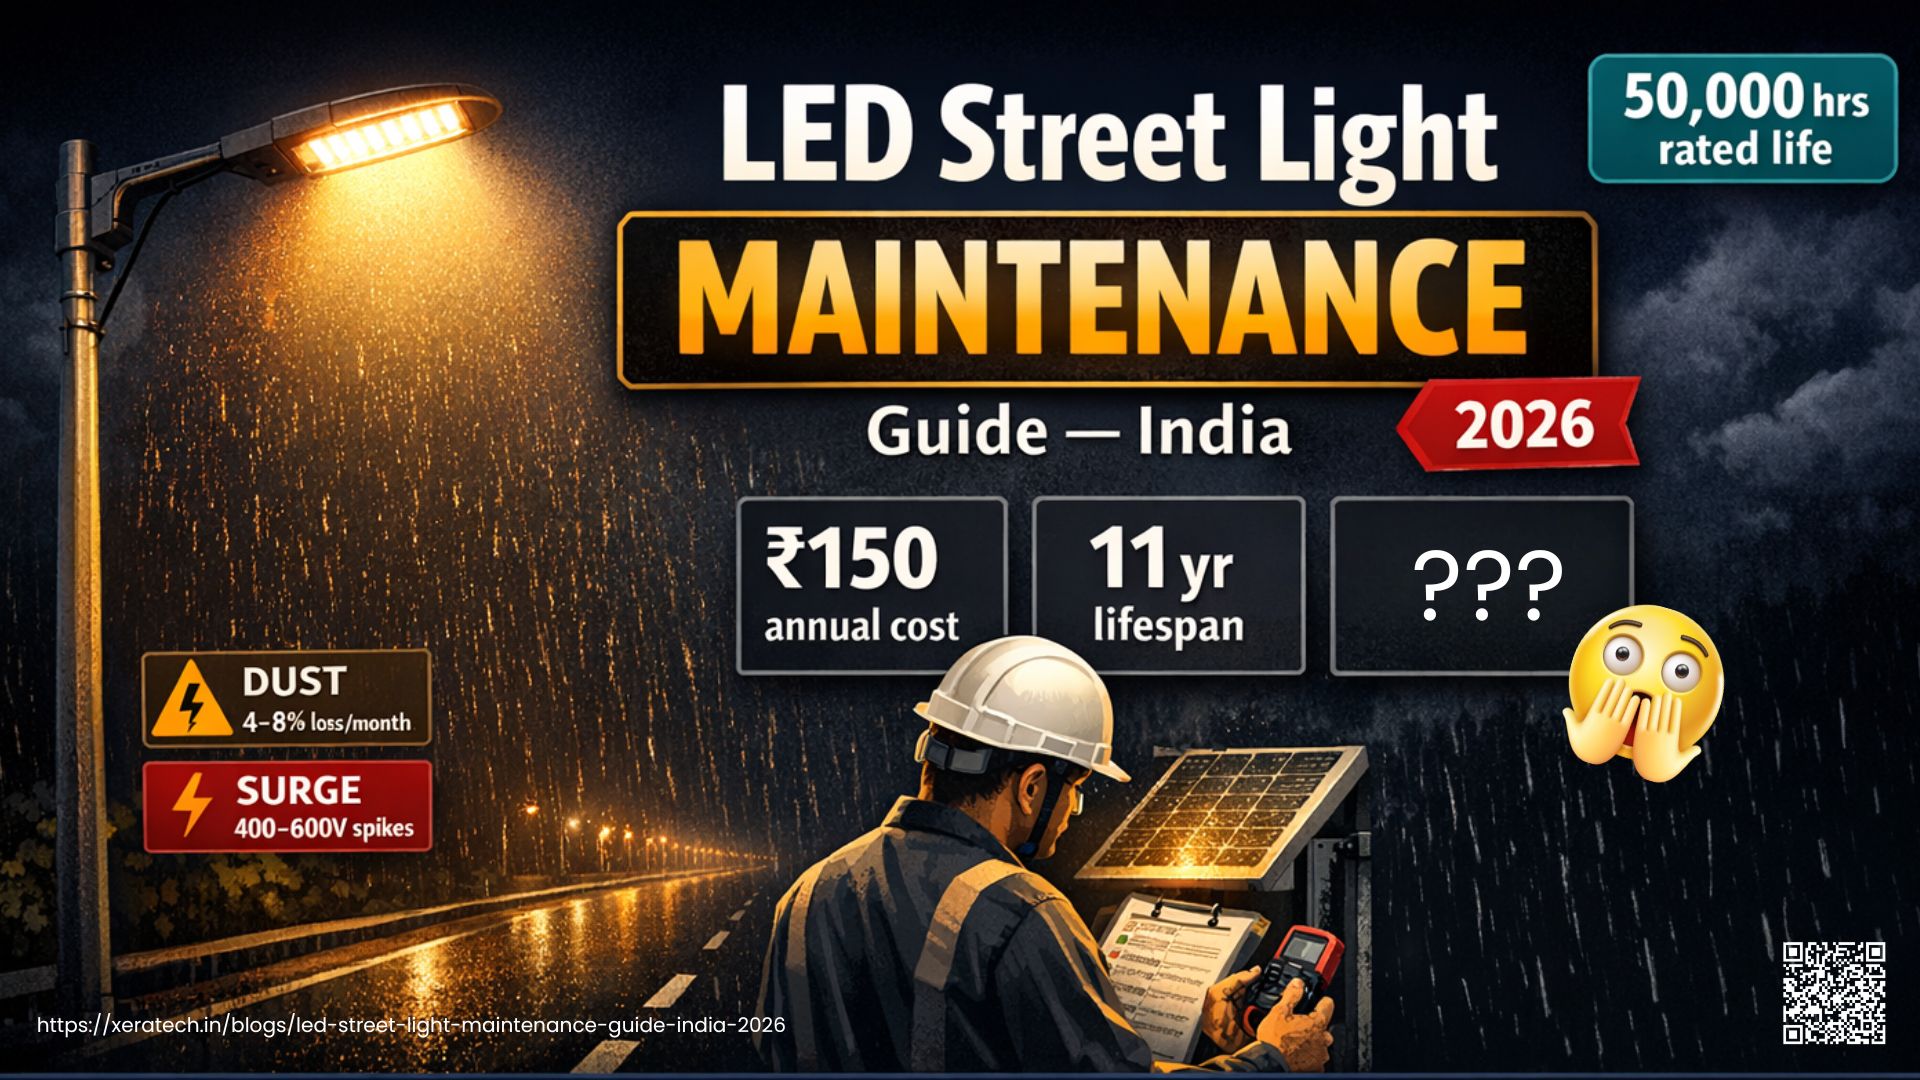
A BIS-certified LED street light is rated for 50,000 hours of operation. At 12 hours per night, that is over 11 years of life. Whether that rated life is actually achieved depends almost entirely on how the system is maintained. In India's conditions: dust seasons that coat solar panels, monsoon voltage spikes that stress LED drivers, and salt humidity on coastal roads that corrodes connections, routine maintenance is the difference between a 3-year failure and an 11-year asset. This guide gives municipal engineers, EPC contractors, and facility managers a complete, India-specific maintenance system for both grid-connected LED street lights and solar street lights.
Why Maintenance Matters More Than You Think
Street lighting maintenance consumes 10 to 15% of a typical Indian municipal body's annual budget (Source: ESMAP World Bank Infrastructure Report, 2026 operational update). With India's LED street light base now exceeding 1.34 crore installed lights under EESL's Street Light National Programme, the cumulative cost of poor maintenance runs to hundreds of crores of rupees per year in premature replacements and lost illumination. At the project level, a single 50W LED street light that fails at year 3 instead of year 11 wastes 8 years of amortised asset life.
The three root causes of premature LED street light failure in India are: dust and soiling on solar panels (reducing charging by 4 to 8% per month in northern and western India), grid voltage spikes during monsoon season (common in rural feeders, damaging LED drivers), and moisture ingress into connection points (corroding terminals and causing intermittent faults or total failure). All three are preventable with the schedules and procedures in this guide.
Grid LED Street Light: Maintenance Schedule
Grid-connected LED street lights (Glass Model and Lens Model, 24W to 200W) have fewer maintenance requirements than solar street lights because there is no panel or battery to manage. The maintenance focus is on optical cleanliness, connection integrity, driver health, and pole structural condition.
Monthly tasks (10 to 15 minutes per pole)
- Visual check: confirm the light is operating at night (drive or walk the road after dusk). Note any dark poles on a fault log.
- Wipe the glass or lens cover with a damp cloth to remove dust and insect deposits that reduce lumen output by 10 to 20% over time.
- Check that the fixture is correctly aimed on its outreach arm and has not shifted due to wind or vibration.
Quarterly tasks
- Open the driver compartment (switch off circuit at feeder pillar first). Inspect the LED driver board and capacitors for signs of browning, burn marks, or bulging capacitors. A swollen or browned capacitor indicates imminent driver failure.
- Check all cable entry glands. Re-tighten any that have loosened. Confirm the silicone seal around each gland is intact. Cracked silicone is the most common entry point for monsoon moisture.
- Inspect the connection terminals inside the housing for oxidation or corrosion (white or green deposits on copper). Clean with a dry brush and apply terminal grease if oxidation is present.
- Check pole vertical alignment: a pole leaning more than 2° from vertical should be re-plumbed before the next storm season.
Annual tasks
- Torque-check all mounting bolts on the outreach arm and pole flange to manufacturer specification. Vibration loosens fasteners over 12 months.
- Test the feeder pillar circuit breaker and fuse rating. Over-rated fuses fail to protect drivers from surge damage.
- Measure and record lux levels at three points on the road surface. Compare to the original commissioning measurement. A lux drop of more than 20% from commissioning levels at the same fixture indicates lumen depreciation requiring investigation.
- Inspect the pole base for corrosion at the ground line (the most vulnerable point). See Section 8 for the full pole corrosion inspection procedure.
Solar Street Light: Maintenance Schedule
Solar street lights have one additional maintenance requirement that grid-connected lights do not: the solar panel must be kept clean to maintain charging efficiency. Everything else follows the same logic as LED street light maintenance, with the addition of battery health monitoring for LiFePO4 systems.
Monthly tasks
- Clean the solar panel surface with a soft damp cloth (plain water, no abrasive cleaners). In dusty areas (Rajasthan, Maharashtra Vidarbha, parts of UP and Bihar), clean every 3 to 4 weeks. In less dusty coastal or Konkan areas, monthly is sufficient.
- Confirm the light operates from dusk to dawn. If the light switches off before midnight, the battery is not receiving a full charge, which usually indicates panel soiling or shading from a newly grown branch.
- Check that the panel angle has not shifted. Semi-integrated panels should face south at 15° to 25° tilt for optimal solar gain across India.
Quarterly tasks
- Inspect all wiring connections between the panel, controller, battery, and LED head. Check for chafing on cable sheathing near pole edges or cable clips. Chafed sheathing in contact with the metal pole causes ground faults that trip the controller.
- Check the charge controller indicator LEDs (where accessible): a green indicator during daylight confirms the panel is charging. An amber or red indicator during peak sun hours indicates a panel, wiring, or controller fault.
- Clean the LED fixture cover as per the grid LED schedule above.
- On all-in-one models: check the rear battery compartment seal. The gasket must be intact. Any cracking of the gasket allows moisture ingress into the battery housing during monsoon rains.
Annual tasks
- Measure panel open-circuit voltage in full sun (between 10am and 2pm) and compare to the rated VOC on the panel datasheet. A reading more than 15% below rated VOC indicates panel degradation requiring investigation.
- Check battery capacity (if the controller has a battery status display or app): a LiFePO4 battery that no longer holds enough charge to run the light for a full night after a full sunny day is approaching end-of-life.
- Verify pole structural integrity and fastener torque as per the grid LED schedule above.
For more on solar street light system components and how they affect maintenance requirements, see the solar street light technical guide. For battery chemistry specifics, see the guide on why LiFePO4 batteries are best for Indian solar applications.
Fault Diagnosis: Driver Failure vs LED Failure vs Wiring Fault
When a street light stops working or behaves abnormally, the fault is almost always in one of three places: the LED driver (most common), the LED module itself, or the wiring and connections. Correctly identifying which one saves significant cost: a driver replacement typically costs Rs 400 to Rs 1,200 and takes 30 minutes. Replacing an LED module costs Rs 800 to Rs 2,500. Replacing the entire fixture when only the driver has failed wastes the asset entirely.
| Symptom | Most Likely Cause | Diagnosis Step | Recommended Action |
|---|---|---|---|
| Light completely off, no flicker | Driver failure or circuit breaker trip | Check feeder pillar breaker first. If breaker is on, test voltage at driver input terminal. Zero voltage = wiring fault. Correct voltage = driver failure. | Reset breaker or replace driver. If driver replacement does not restore output, test LED module. |
| Light flickers intermittently | Loose connection or driver capacitor degrading | Tighten all terminal screws. If flickering continues, inspect driver capacitors for swelling or browning. | Re-terminate all connections with correct ferrules. Replace driver if capacitor damage is visible. |
| Light dims progressively over months | LED lumen depreciation (normal) or driver output voltage dropping | Measure driver output voltage under load. Compare to rated output. A drop of more than 10% indicates driver degradation. | If lumen drop exceeds 30% from commissioning values, replace LED module or driver as indicated by test. |
| Light on during daytime (grid LED) | Photocell or daylight sensor failure | Cover the photocell briefly. If light switches off, the photocell has failed. If light stays on, the driver timer has failed. | Replace photocell or reprogram driver timer module. |
| Solar light off before midnight | Battery capacity loss or panel undercharging | Clean panel first and observe next night. If problem persists, measure battery voltage at dusk. Below 3.2V per cell on LiFePO4 indicates low state of charge. | Check panel for shading or soiling. If fully charged panel gives same result, battery replacement needed. |
| Solar light fully off, no operation | Controller failure, deep battery discharge, or wiring fault | Check controller indicator LEDs. Solid red typically indicates deep discharge protection triggered (battery voltage too low to operate). | Connect panel directly to battery for 4 to 6 hours to recover charge. If battery does not recover above 12V (for 12V systems), battery replacement needed. |
| Burning smell from fixture | Driver overheating or PCB short circuit | Switch off immediately at breaker. Do not re-energise until inspected. Open housing and inspect for burn marks on PCB or heat sink. | Replace driver or full fixture depending on damage extent. Check supply voltage for over-voltage condition before re-installation. |
Monsoon Pre-Season Checklist
In India, the monsoon season (June to September across most states) is the highest-risk period for LED street light failures. Grid voltage fluctuations increase sharply as agricultural pump loads switch on and off across rural feeders. Moisture finds its way into any unsealed entry point. Wind loads on poles and fixtures increase significantly during heavy rain events. A pre-monsoon inspection in late May or early June, before the first heavy rains, prevents the majority of monsoon-season failures.
| # | Inspection Item | Pass Condition | Action if Failed |
|---|---|---|---|
| 1 | Cable entry gland seals | Silicone seal fully intact, no cracks or gaps | Re-seal with weatherproof silicone sealant |
| 2 | Fixture housing fasteners | All screws torque-tight, no corrosion on threads | Replace corroded fasteners with stainless equivalents |
| 3 | Outreach arm mounting bolts | No play or movement when arm is pushed laterally | Re-torque or replace bolts. Check pole collar weld. |
| 4 | Surge protection device (SPD) at feeder pillar | SPD indicator green or intact. No visible burn marks. | Replace SPD before monsoon season if degraded |
| 5 | Solar panel frame and back-rail screws | Panel does not flex or rattle when shaken by hand | Re-tighten or replace mounting hardware |
| 6 | Battery housing seal (solar lights) | Gasket supple and fully seated. No cracks. | Replace gasket before monsoon. Rs 50 to Rs 150 cost. |
| 7 | Pole base paint and ground-line coating | Paint intact from 300mm below grade to 300mm above | Clean, prime, and repaint ground-line zone with bitumen paint |
| 8 | Junction box and underground cable duct | No standing water in duct. Junction box lid sealed. | Clear drainage. Re-seal junction box lid gasket. |
| 9 | Tree branch clearance from solar panel | No branch within 1 metre of panel. No shading at 11am solar time. | Trim or arrange branch clearance before monsoon growth flush |
| 10 | Overall structural alignment | Pole vertical within 2° of plumb | Re-plumb pole if leaning. Check foundation integrity. |
Voltage Surge Protection in Indian Conditions
Grid voltage surges are the single most common cause of LED driver failure in rural and semi-urban India. When agricultural pump motors switch off abruptly, or when a nearby transformer trips, the resulting voltage spike can reach 1,000V to 2,000V on an 11kV distribution line before it damps out. On the LT side (230V consumer supply), surges of 400V to 600V are common in rural Maharashtra, Andhra Pradesh, Rajasthan, and UP during peak irrigation season (March to June) and during monsoon feeder trips.
A standard LED driver rated for 90V to 300V AC input has internal surge protection rated to approximately 2 to 4 kV. This is adequate for normal grid conditions but not for the severe surge environment of agricultural rural feeders. Three protection measures prevent surge-related driver failures:
1. Surge protection device (SPD) at feeder pillar
Install a Type 2 SPD (Class II, rated 10kV for 8/20µs surge per IEC 61643-11) at the feeder pillar serving each circuit of street lights. A Type 2 SPD diverts surge energy to earth before it reaches the LED drivers. Cost: Rs 800 to Rs 2,500 per feeder pillar depending on current rating. This is the most cost-effective protection investment available.
2. Correct earthing of each pole
Every street light pole must have a correctly installed earth electrode: a 1.2m GI earth rod driven vertically at the pole base and connected to the pole body with a 16mm² earth conductor. In India, earth electrode resistance must be below 10 ohms per IS 3043. Poor earthing means surge energy has nowhere to go except through the LED driver circuit. Measure earth resistance at every pole at least every 3 years.
3. Wide-input-range drivers
Always specify LED drivers with 90V to 300V AC wide input range (not 220V to 240V narrow range drivers). Wide-input drivers handle sustained over-voltage conditions that narrow-input drivers cannot. All Xera Tech LED street lights use 90V to 300V wide-input drivers as standard. If you are purchasing replacement drivers for non-Xera Tech fixtures, confirm the input voltage range before installation.
For BIS IS 10322 (revised February 2026) requirements on surge protection, see the complete guide to road lighting standards and BIS IS 10322 compliance.
LiFePO4 Battery Health: Signs and Replacement Timing
The LiFePO4 (Lithium Iron Phosphate) battery is the most critical component in a solar street light system and the one most likely to determine the system's functional lifespan. A healthy LiFePO4 battery in Indian conditions delivers 2,000 or more charge cycles: at one full cycle per day, that is 5.5 years minimum, and with partial cycling under normal monsoon and dust conditions, real-world life is typically 7 to 10 years.
These are the signs that a LiFePO4 battery is approaching end-of-life and requires replacement:
| Indicator | Healthy Battery | Degraded Battery (Replace Soon) |
|---|---|---|
| Operating hours at full brightness | Full night (10 to 12 hours) after a full sunny day charge | Light dims or switches off before midnight after a full sunny day |
| Autonomy on cloudy days | 2 to 3 cloudy days before output reduction (semi-integrated systems) | Less than 1 full night on a cloudy day |
| Controller battery indicator | Green (high state of charge) at dusk | Amber or red at dusk even after full sunny day |
| Physical inspection | Cell casing flat and undistorted | Cell casing slightly swollen or bulging (replace immediately) |
| Charging temperature | Battery warm but not hot to touch during charging | Battery hot to touch during charging (thermal runaway risk) |
| Open circuit voltage (12V system, fully charged) | 13.2V to 13.4V | Below 12.8V after 6-hour full-sun charge |
When replacing a LiFePO4 battery, always replace like-for-like in terms of capacity (Ah rating) and nominal voltage. Never substitute a lead-acid battery for a LiFePO4 in an existing solar street light: the charge controller is programmed for LiFePO4 charge voltage profiles (3.65V per cell absorption) and will either undercharge or damage a lead-acid battery installed in its place.
For a full technical comparison of battery chemistries in Indian solar applications, see why LiFePO4 batteries are best for solar street lights in India.
Pole and Hardware Corrosion Inspection
Steel street light poles corrode from two locations: the ground line (where the pole enters the soil or concrete foundation) and the internal moisture trap (where water pools inside a hollow pole above the foundation base plate). Both failure modes can cause a pole to snap at or near the base during a wind event, with serious safety consequences.
Ground-line corrosion inspection procedure
Excavate 150mm to 200mm of soil around the pole base to expose the ground-line zone. Inspect the pole wall thickness using a hammer tap test: a dull thud indicates wall thinning from internal corrosion; a clear ring indicates healthy steel. Probe any paint blistering or rust bleeding with a screwdriver. If the screwdriver penetrates the pole wall, the section is critically weakened and the pole must be replaced before the next storm season.
Prevention: Apply bitumen-based anti-corrosion paint or bituminous tape wrap from 300mm below the foundation surface to 300mm above ground. Reapply every 3 to 5 years. For coastal zones in Maharashtra, Goa, and Kerala, apply every 2 years and use hot-dip galvanised poles rather than painted mild steel for new installations.
Internal moisture management
Hollow tubular steel poles trap condensation inside during temperature cycles. Over years, standing water inside the pole corrodes the inner wall from inside, which is invisible from outside. Prevention: ensure the drain hole (typically a 12mm diameter hole drilled 150mm above the base plate) is unobstructed. Clear it annually with a wire probe. Check that the base plate has a drainage path and is not sealed flat to concrete that traps water.
| Location | Risk Level | Inspection Frequency | Protection Treatment |
|---|---|---|---|
| Inland Maharashtra, Karnataka, Andhra Pradesh | Moderate | Every 3 years for ground-line; annually visual | Bitumen paint at ground line, galvanised hardware |
| Coastal zones (Konkan, Goa, Kerala, coastal AP) | High | Annually for ground-line; quarterly visual | Hot-dip galvanised poles, stainless hardware, annual anti-corrosion treatment |
| Industrial estates (MIDC, chemical zones) | High | Annually | Chemical-resistant epoxy paint system, stainless fasteners |
| High-rainfall areas (Western Ghats, northeast) | Moderate to high | Every 2 years for ground-line | Bitumen tape wrap, drain hole maintenance |
When to Repair vs When to Replace
The repair vs replace decision for LED street lights comes down to three factors: age of the fixture, cost of the repair relative to replacement cost, and availability of spare parts. The decision matrix below covers the most common scenarios.
| Fault | Fixture Age | Repair Cost | Decision |
|---|---|---|---|
| Driver failure (single unit) | Under 5 years | Rs 400 to Rs 1,200 | Repair. Driver replacement is cost-effective and fast. |
| Driver failure (single unit) | Over 8 years | Rs 400 to Rs 1,200 | Evaluate. If LED module is also showing lumen depreciation, full replacement may be better value. |
| LED module failure | Under 5 years | Rs 800 to Rs 2,500 | Repair if within warranty. Out of warranty, compare module cost to 30 to 40% of new fixture cost. |
| LiFePO4 battery (solar) | 7 to 10 years | Rs 2,000 to Rs 6,000 | Replace battery only if LED and panel are healthy. Full system replacement if LED is also at end of life. |
| Pole corrosion at ground line | Any age | Rs 3,000 to Rs 8,000 (pole replacement) | Replace pole. Structurally compromised poles are a safety hazard regardless of fixture condition. |
| Physical damage (vehicle impact, vandalism) | Any age | Varies | Assess case by case. Minor housing damage: repair. Structural frame damage or cracked LED module: replace. |
| General lumen depreciation (below 70% of rated output) | Over 10 years | Full module replacement | Replace full fixture. At L70 the LED has reached rated end-of-life. New fixture delivers 30% more light at same wattage. |
Xera Tech supplies spare LED drivers, LED modules, and LiFePO4 batteries as service parts for all current-range products. Contact Xera Tech at +91 9607908432 or connect@xeratech.in with your product SKU to confirm parts availability and pricing before making the repair vs replace decision.
How to Raise a Warranty Claim with Xera Tech
All Xera Tech LED street lights, solar street lights, and flood lights carry a 2-year manufacturer warranty from the invoice date. The warranty covers manufacturing defects in the LED module, LED driver, and housing. It does not cover damage from incorrect installation, grid over-voltage without SPD, physical impact, or failure caused by using non-Xera Tech spare parts inside the fixture.
Warranty claim procedure
Step 1: Confirm the fault is a genuine manufacturing defect using the fault diagnosis guide in Section 4 of this document. Document the symptom with a photo or video.
Step 2: Locate the invoice or purchase order for the product. The invoice date establishes the warranty start date.
Step 3: Contact Xera Tech with: product name and SKU, invoice number and date, installation address, fault description, and photos or video of the fault.
| Channel | Contact | Best For |
|---|---|---|
| WhatsApp (fastest response) | +91 9607908430 | Photo/video fault documentation, quick assessment |
| Service line | +91 9607908432 | Technical queries, spare parts availability |
| connect@xeratech.in | Formal warranty claim with invoice attached | |
| Contact page | xeratech.in/contact | Project-specific service requests |
Step 4: Xera Tech's service team will assess the claim and advise on: replacement under warranty, repair with service parts, or if the failure falls outside warranty coverage and the cost of out-of-warranty repair or replacement.
Annual Maintenance Log Template
Use this template to record maintenance actions for each street light in your installation. One row per pole. Print or copy into a spreadsheet for digital records. Maintaining this log supports warranty claims, municipal audit compliance, and planning for bulk driver or battery replacement cycles.
| Pole No. | SKU / Product | Install Date | Q1 Service Date | Q2 Service Date | Q3 Service Date | Q4 / Annual Service | Faults Noted | Parts Replaced | Lux at 1m (Annual) | Next Action |
|---|---|---|---|---|---|---|---|---|---|---|
| 001 | SL-GM-50 | 2026-01-15 | 2026-03-20 | 2026-06-10 | Cover dust | None | 18 lux | Continue schedule | ||
| 002 |
For gram panchayat and municipal bodies managing large street light inventories, Xera Tech's service team can assist in setting up a structured maintenance programme as part of annual service contracts. Contact xeratech.in/contact for service contract enquiries.
Related technical guides: road lighting standards and lux compliance guide, LED street light wattage and spacing guide, and 10 benefits of solar street lights over grid lights.
Frequently Asked Questions
Need Service Support or Spare Parts for Your Xera Tech Street Lights?
Xera Tech, LED and solar lighting manufacturer at Satpur MIDC, Nashik, Maharashtra, provides after-sales service support, spare parts (drivers, LED modules, LiFePO4 batteries), and maintenance consultation for all current-range products across India. Annual service contracts available for municipal and gram panchayat projects.
WhatsApp Service Team Browse Street Lights Contact for Service ContractLooking for the right LED solution?
Xeratech manufactures BIS-certified LED flood lights, solar street lights, highbay lights and more — shipped across India.
Xera Tech is a BIS-certified LED lighting manufacturer established in 2017, headquartered in Nashik, Maharashtra , India. Product range: LED Street lights, Decorative lights, solar street lights (all-in-one & semi-integrated), LED Flood lights, decorative poles, and high mast lights — all manufactured at Satpur MIDC and compliant with IP65/IP67 and photometric standards. Learn more about Xera Tech →